

How To Repair Cat Scratches On Leather Sofa
How to Ready True cat Scratches on Leather Article of furniture
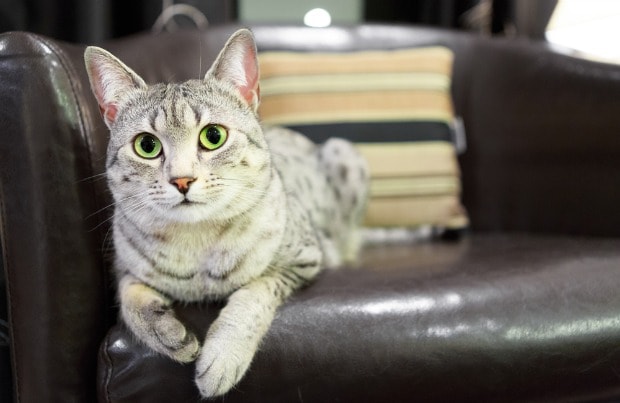
Unless kitty is constantly wearing nail tips, cats and leather typically don't mix. If your feline has made your expensive furniture into her scratching mail, it may not exist completely beyond repair. Try to salve your leather chair or sofa with some tips from the experts.
What You'll Need
- Leather cleaner
- Scissors
- Sponge
- Paintbrush
- Leather binding glue
- Sandpaper
- Leather putty
- Leather colorant
- Leather sealant
- Leather terminate
Fixing Harm Caused by True cat Kneading
Not all cat scratch harm is created equal. The expanse of furniture that Fluffy has clawed will make up one's mind your best arroyo to the fix. If kitty is on her hind legs and digging her nails into the sides of the chair or sofa, part of her claw action involves extending and retracting her talons. By doing then, says Harry Kahn of Expert Leather Care in Fort Lauderdale, Fla., Kitty is essentially plucking out the hairs (as well called fibers) from the leather. The event is an area that looks similar a pilled-up sweater, with petty thread balls roughening upward the surface.
Fixing True cat Scratches on Article of furniture
- Set up the damaged surface area by thoroughly cleaning any crud or dirt off with a cleaning product specifically designed for cleaning leather. Any professional leather intendance service tin recommend a quality brand, frequently sold in their stores.
- Trim the loose fibers by clipping with scissors as close to the base of the pilling every bit possible, beingness conscientious not to cut, puncture or cause further damage. Whatever shorter hairs left behind will non touch the feel and wait of the finish outcome, nor the quality of the repair.
- Utilize gum specifically fabricated for binding leather past putting a small amount onto a sponge and rubbing it right into the damaged area. Allow time for the start coat to dry, and re-apply 7 to nine times (with sufficient drying time between each application) to ensure a long-lasting, strong repair.
- Employ fine sandpaper (1200 dust) to lightly smooth the surface area treated with the leather gum. Take your time and apply a gentle bear upon to avoid roughing up the repair. A proper sanding job will produce an even, smooth surface to provide the base of operations for the residuum of the repair process.
- Remove any sandpaper balance to ready for the heavy filler, a sort of leather putty, application. Using a palette knife, spread the filler in a sparse layer on superlative of the scratches. Allow the filler to dry for 20 to 25 minutes, inspect your work, and reapply an additional layer if needed to fill in gouges, deep scratches, and holes.
- Once the heavy filler has dried, have your sandpaper out once again and smooth out the repaired area. Later on it's sufficiently sanded, wipe down the leather with the special leather cleaning solution to remove whatsoever sandpaper rest or dirt. The repaired area must be clean in order for the colorant to adhere to the leather.
- After the leather cleaner has dried, put a small amount of the colorant on a fresh, clean sponge and employ a thin layer to the repaired area. Besides putting the color dorsum into your leather, sometimes it likewise reveals spots that need some extra repair. If then, reapply more filler, sand it down later it has dried, and reapply the colorant over again.
- One time the first coat of colorant has been applied and stale, a spray-on colorant that comes with an airbrush should be swept over your repair in single layers. Let each application dry before applying the next. Use as many thin layers of colorant as needed to completely alloy in the repaired area with the intact area and to hide the repair.
- Use leather lacquer (also called leather sealant) to seal the color in and prevent rub-off or fading. Using a clean sponge or airbrush, use the sealant in three or iv layers to enhance the repaired leather's flexibility and sturdiness. Let each layer dry out thoroughly before applying the next.
- The final footstep is to apply a leather finish product, once again in sparse layers with sufficient drying time in between each one. The stop should be practical with an airbrush or make clean sponge in four to v layers. This seals in the work you've done and protects it from ordinary wear, but unfortunately, your true cat'due south nails can ruin it again.
Fixing Impairment Caused past Swiping
Repairing damage washed by kitty scratching across the surface of your leather, rather than kneading it with her claws, is a much simpler, quicker procedure. Provided the scratches are strictly on the surface and have non cut the leather apart, the lighter shade of discoloration can be hidden with a leather re-coloring lotion. Just use the balm to hide the scratches and alloy it in with the rest of the leather on the piece. Kahn advises that if the scratches have cut through the leather, no do-it-yourself fix volition be adequate; it'due south best left to the professionals.
Although the repair process is long and wearisome, your leather can be restored so well that only you and Kitty know about the damage.
Image: Sarah Fields Photography via Shutterstock.
Valerie Trumps

Source: https://be.chewy.com/pet-parenting-diy-recipes-how-to-fix-cat-scratches-on-leather/
Posted by: mitchellwomers.blogspot.com
0 Response to "How To Repair Cat Scratches On Leather Sofa"
Post a Comment